Capturing the dynamic energy of live concerts and festivals presents a unique photographic challenge, distinct from studio or landscape work. For beginners aiming to produce compelling, marketable imagery, understanding the core principles and practical considerations is crucial. This isn't just about snapping pictures; it's about crafting visual narratives that resonate with audiences, whether for personal portfolios, event promotion, or content marketing. The goal is to move beyond casual snapshots and develop a systematic approach to pre-production, on-site execution, and post-processing that yields high-quality, impactful results consistently.
Essential Gear for Event Photography
Success in event photography begins with appropriate equipment, but "appropriate" doesn't always mean expensive. Beginners can achieve strong results by understanding how to leverage their current setup effectively and making informed decisions about future upgrades. Focus on reliability and performance in low-light, high-contrast environments.
Camera Body and Lens Choices
A camera body with good low-light performance (higher ISO capabilities with minimal noise) is advantageous. Full-frame sensors generally excel here, but modern APS-C cameras can also perform well. The lens choice, however, often dictates the quality of your images more than the body. Fast lenses (low f-number) are critical for gathering sufficient light in dark venues and achieving subject isolation.
- Standard Zoom (e.g., 24-70mm f/2.8 or 17-50mm f/2.8 for APS-C): Offers versatility for wider stage shots and tighter performer portraits without frequent lens changes. This is often the most practical starting point.
- Telephoto Zoom (e.g., 70-200mm f/2.8): Essential for capturing distant performers, especially in larger venues or when access to the stage is limited. The constant f/2.8 aperture is key for low light.
- Prime Lens (e.g., 50mm f/1.8 or 85mm f/1.8): Excellent for extremely low light and creating shallow depth of field. While less versatile, their superior light-gathering and sharpness can produce stunning individual shots.
Battery and Storage Management
Live events are long and demanding. Always carry at least three fully charged camera batteries. For storage, use high-speed SD or CFexpress cards with ample capacity. Multiple smaller cards (e.g., 64GB or 128GB) are often preferred over a single large one, mitigating the risk of losing all images if a card fails. Format cards in-camera before each event.
Protection and Portability
Event environments can be unpredictable. Protect your gear from dust, moisture, and accidental bumps. A durable camera bag with padded compartments is essential. Consider rain covers for outdoor festivals. A comfortable camera strap or harness will reduce fatigue during long shoots.
Mastering Event Lighting
Concert and festival lighting is dynamic and often challenging. Beginners must learn to adapt quickly to rapidly changing light conditions, from bright daylight to erratic stage lights and near darkness. For beginners, understanding best lighting tips for indoor event photos can help in adapting to changing light conditions.
Anticipating Stage Lighting
Stage lighting is rarely static. Observe patterns and anticipate changes. Performers are often best lit during specific moments or songs. Use a fast shutter speed (e.g., 1/250s or faster) to freeze motion, and adjust ISO and aperture accordingly. Metering mode should typically be spot metering, focusing on the performer's face to ensure accurate exposure despite bright spotlights or dark backgrounds.
Using Available Light
Avoid relying solely on your camera's pop-up flash or an on-camera speedlight, which can produce harsh, unflattering results and annoy performers and audience members. Instead, leverage ambient light from stage productions, video screens, or even general venue lighting. This creates a more authentic and atmospheric image.
Pro Tip: When shooting in extremely low light, increasing your ISO is often preferable to using a flash. Modern cameras handle higher ISOs with acceptable noise levels, preserving the natural mood and avoiding harsh shadows. Experiment with your camera's limits before the event.
Composition and Storytelling
Beyond technical settings, compelling event photography tells a story. Think about the atmosphere, the connection between performers and audience, and the unique moments that define the event.
Capturing the Atmosphere
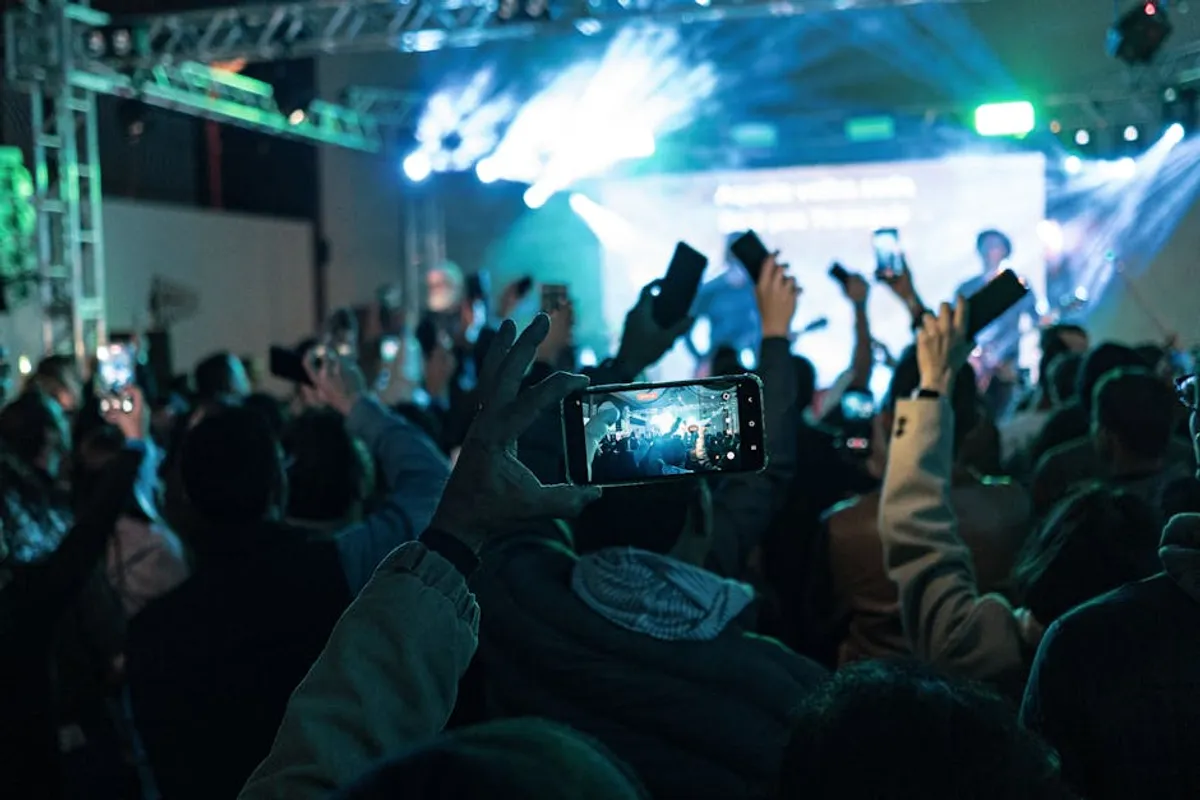
Don't just shoot the stage. Look for wide shots that include the crowd, the venue architecture, and the overall scale of the event. These shots provide context and convey the immersive experience. Use leading lines, symmetry, and the rule of thirds to create visually engaging compositions.
Focusing on Performers
Isolate performers by using a shallow depth of field (wide aperture) to blur distracting backgrounds. Capture a range of expressions, gestures, and interactions. Look for peak action moments – a guitarist mid-solo, a singer reaching a high note, a drummer in full swing. Shoot bursts to increase your chances of catching these fleeting moments.
Audience Interaction Shots
The audience is an integral part of the event's energy. Capture their reactions, excitement, and participation. Shots of hands in the air, cheering faces, or shared moments of joy add a human element and commercial value to your imagery, demonstrating engagement.
Navigating the Crowd and Venue
Access and positioning are critical for beginners. Understanding venue rules and respecting personal space are paramount.
Strategic Positioning
Arrive early to scout locations. Identify vantage points that offer clear views of the stage and opportunities for crowd shots. If you have a photo pass, understand your allotted access areas (e.g., photo pit, soundboard, specific sections). Without a pass, be prepared to navigate and find gaps in the crowd, often requiring patience and a respectful approach.
Respecting Personal Space and Rules
Always be mindful of other attendees. Avoid blocking views unnecessarily. If you're in a photo pit, adhere to the "first three songs, no flash" rule, which is common industry practice. Never interfere with security or event staff. Building a reputation as a professional and considerate photographer can open doors for future access.
Post-Production Essentials
The work isn't finished when the last note fades. Post-processing transforms raw images into polished, deliverable assets. Beginners should focus on fundamental adjustments.
Culling Efficiently
Review your images immediately after the event. Delete obvious rejects (blurry, poorly exposed, repetitive) to streamline your workflow. Rate your best shots (e.g., 5 stars) to prioritize editing. This saves significant time in the long run.
Basic Edits for Impact
Focus on adjustments that enhance the image without over-processing. Key edits include:
- Exposure: Correcting overall brightness.
- White Balance: Adjusting color temperature to ensure natural-looking colors, especially under mixed stage lighting.
- Highlights/Shadows: Recovering detail in blown-out lights or deep shadows.
- Contrast: Adding punch and separation.
- Clarity/Texture: Enhancing detail without introducing artifacts.
- Cropping/Straightening: Improving composition and correcting horizons.
Backup Workflow
Immediately back up your edited images to at least two separate locations (e.g., external hard drive and cloud storage). Data loss is a significant risk, and a robust backup strategy is non-negotiable for any serious photographer.
Refining Your Event Photography
Consistent practice and critical self-assessment are key to improvement. Attend diverse events, experiment with new techniques, and analyze your results.
Practice: Volunteer to shoot local band gigs, open mic nights, or community festivals. These opportunities allow you to hone your skills without the pressure of a major event. Each shoot is a learning experience, revealing strengths and areas for improvement.
Review and Learn: Analyze your images for technical flaws (focus, exposure, noise) and compositional weaknesses. Seek constructive feedback from more experienced photographers. Understanding what worked and what didn't is crucial for growth.
Build a Portfolio: Curate your best work into an online portfolio. This showcases your capabilities and is essential for securing future opportunities, whether paid assignments or photo passes for larger events.
Frequently Asked Questions
What is the most crucial setting for concert photography?
A fast shutter speed (e.g., 1/250s or faster) is paramount to freeze motion. You'll then adjust aperture and ISO to compensate for light levels while maintaining that shutter speed.
Can I use an entry-level DSLR or mirrorless camera for concert photography?
Yes, many entry-level cameras perform adequately, especially when paired with a fast prime lens (like a 50mm f/1.8). Focus on understanding your camera's low-light limits and mastering exposure settings.
How do I get a photo pass for larger festivals or concerts?
Begin by building a strong portfolio of event photography, often by shooting smaller, local acts. Then, reach out to publicists, band managers, or venue marketing teams with your portfolio and a clear proposal of how your images can benefit their promotion.
Should I shoot in JPEG or RAW format?
Always shoot in RAW. This format captures the maximum amount of image data, providing far greater flexibility for exposure, white balance, and color corrections in post-production, which is critical for challenging event lighting.